Eco Point Mei Cosplay Work Log | Part III Tank
I'm back with part 3 of Mei's cosplay breakdown! Part I covers her jacket and Part II covers the boots if you want to check those out. For the third and final part we'll be tackling her tank!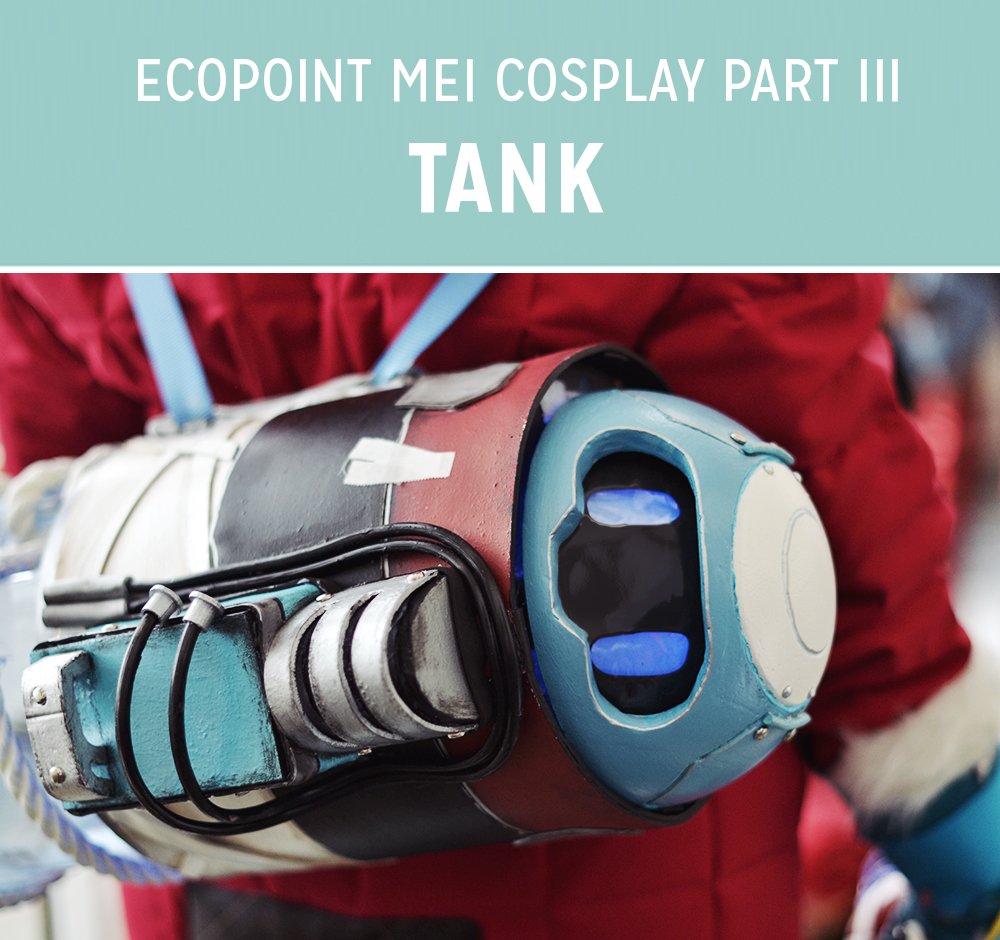
 Let's jump in!
SUPPLIES:
- 3 gallon Water jug (I bought this one from Amazon)
- Half a hollow styrofoam ball (found at Michael's and Jo-Anns for under $10)
- LOTS of sheets of thin craft foam
- Plasti-dip & spray primer
- Acrylic paints - I recommend PlaidFX paints
- 1/4" tubing (I got mine at Home Depot)
- LED lights for inside Snowball's head
TANK BASE
Mei's tank, according to the short, is a water gallon which makes things much easier since a water tank is easy to find and very lightweight. The bottom of the jug (with the handle and nozzle) is left empty, so I focused on the top portion. There are 3 distinct "sections" of the tank: a white band (that looks like it's wrapped), a black band, and a red band. I laid all of this out in foam flat before gluing it around the top third of the tank. The white "wrap" area is just strips of 1/2" foam added to mimic the look of layered materials.To make the back "box" portion that sits on top, I made a box out of foam and glued it together - I don't really think it's "accurate" but I like the effect of how it looks. All details are foam to keep it as lightweight as possible. The black tubing is the 1/4" clear tubing that I pained with acrylics.To seal everything, I covered up the exposed tank with plastic wrap and plasti-dipped all the foam pieces.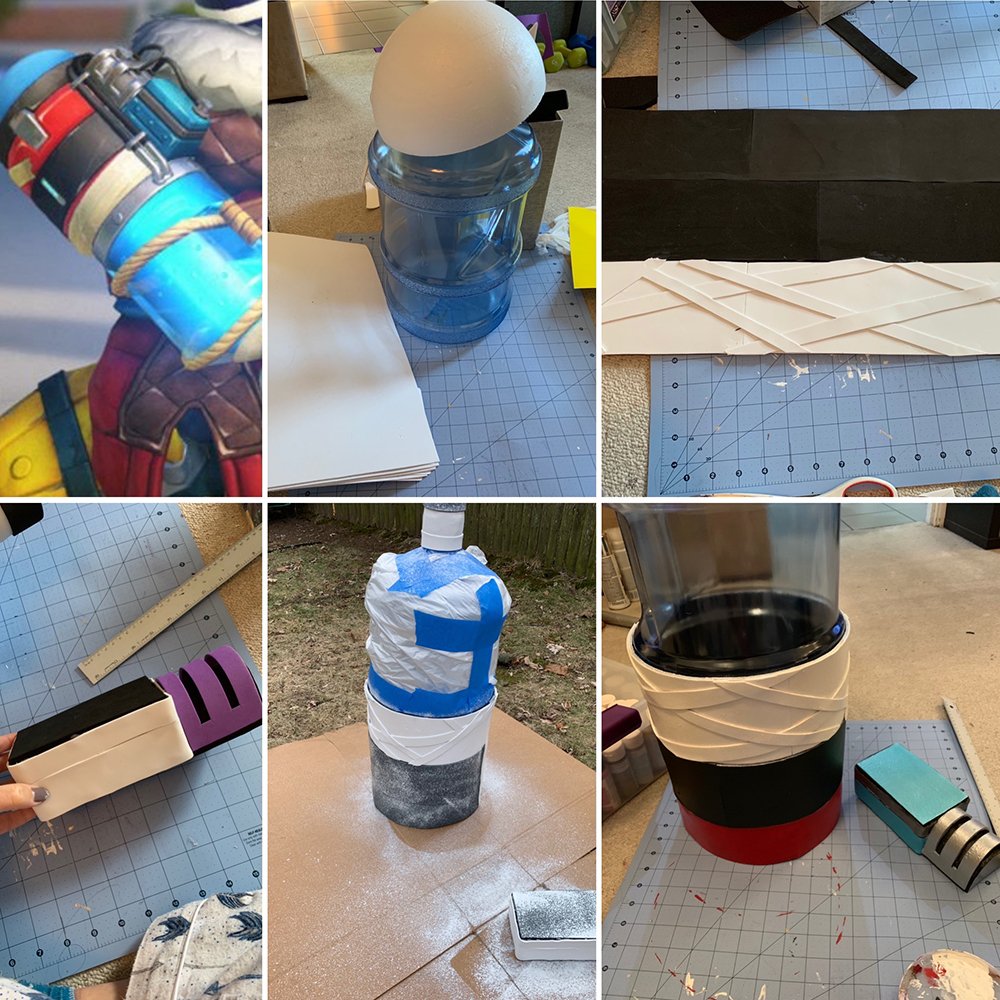 The painting was all hand done with acrylics, and weathered using an old paintbrush and black and brown paint.
SNOWBALL
Snowball was a collaboration between myself and Sam. He started out as a half styrofoam dome. We carved out his face area and sanded the edges until smooth. This took patience; the styrofoam is very easy to tear!Once the carving was done he was primed and spray painted. If you don't prime, the paint will eat the styrofoam. Any additional details were painted on using acrylics.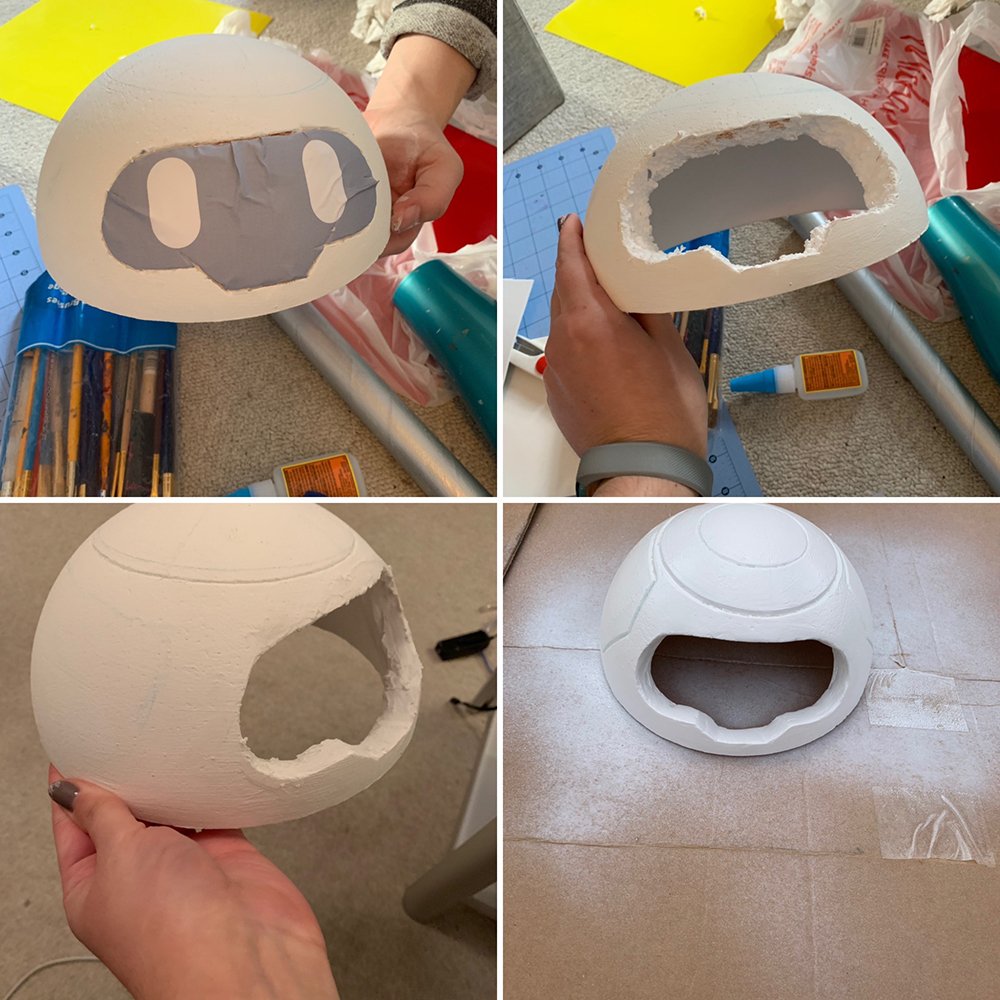
 How he attaches to the tank: This was a challenge. In the end we used a mix of heavy duty velcro and pins that stick into the foam. He sits on a platform at that's about 2" inside the foam "collar". He's removable via velcro to allow us to turn on the little LED lights in his face, which are also velcroed inside of the foam circle. The black platform can also slide out of the tank, and there are LED lights velcroed to that. When they turn on, they illuminate the tank from the flat end side.
STRUCTURE
The tank slides over my shoulders like a backpack. They're attached to the tank using epoxy for maximum adhesive. Since that looked pretty messy, I glued a piece of EVA foam on top and painted/weathered it black. Not the most professional looking, but it's sturdy and sits on my back so it's not too visible. Phew! That takes us to the end of Part 3, Mei's tank! You'll probably be able to borrow some of these tips and tricks if you're doing any of her other skins.Here's the rest of Mei's tutorials! Finished costume post coming shortly:)